
The sky is the limit!
Mar 07, 2021Dreams and hot air balloons go hand in hand!

Well, hello there! I promised that I would be back today with a scrapbook page to share with you! This page is near and dear to my heart for a couple of reasons. First off, it features my oldest kiddo and that is always a favorite topic of mine. He is such an amazing person. He is smart and funny and he makes us so very proud. He makes my heart happy.
The page also feels promising and hopeful to me! I feel with my whole heart that if a scrapbook page evokes any sort of emotion then it is a successful page. This one does that for me.
Let’s talk about this page! I wanted it to have an energetic feel to it, but I also wanted it to have a little dreamy vibe. When we dream, we should dream big! No limits!
There is a lot going on here, so I will break my process down and share how I put it all together.
Laying the foundation

To get started I chose a piece of white 12″ x 12″ card stock for my base and a piece of patterned paper that mimic-ed the background of my photos. Talk about dream-y feeling!
Patterned paper is so much fun. It comes in so many different patterns, themes, and colors. You can use it whole or chop it up into pieces or fussy cut shapes or designs from it. It has so many possibilities.
Breaking up is (not) hard to do
I decided that I wanted to use most of the patterned paper, but not as a whole piece. I cut 1″ off of the right hand side and 1/2″ off of the bottom and that left me with a piece that measured 11″ x 11 1/2″.

Then I cut it into 4 pieces that each measured 2 3/4″ wide x 11 1/2″ tall.

I laid them out on my base piece and wiggled them around until I was pleased with how they were spaced and then I glued them all down. That left me with a happy, cloudy background to start creating my page on.
Cut it out
The first thing I thought of when I decided to work with these photos was a giant hot air balloon. They just seem so fun and full of possibilities to me! I headed straight to my Cricut and cut out a big ole’ hot air balloon.

The balloon itself was two colors, so I chose a teal and a sunny, happy yellow, in keeping with the sky theme. They played so nicely together too.
Making an impression

The balloon pieces were adorable as is, but I wanted to step them up a little bit. So, I dug through my embossing folder collection and found this polka dotted pattern. I ran the yellow pieces through my Big Shot and was so excited with the results that I decided to repeat it with the blue pieces.

Embossing adds so much personality to boring ole’ card stock!
Once I got all of my balloon pieces cut and embossed I assembled them on my page. It is so fun watching your pages start to come to life.
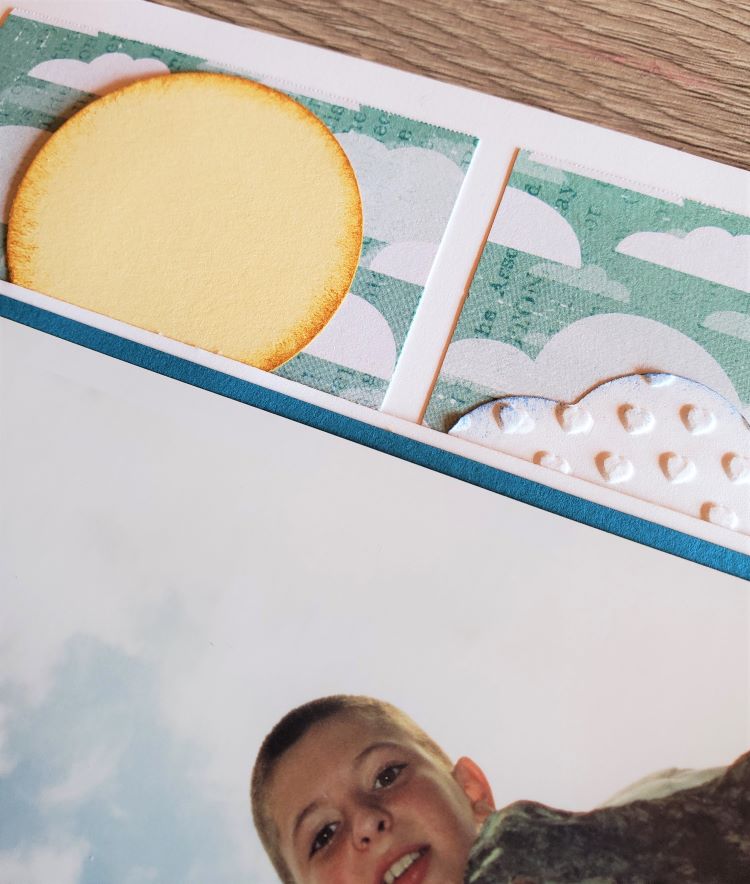
Cloudy with a chance of excitement
Next I moved on to a few clouds. Any time that I can add dimension to a page I try. Layers add so much visual interest.

I used metal dies to cut these clouds with my Big Shot. After I cut them out I ran them through this sweet, little heart embossing folder to add some dimension.

Then I grabbed a teal colored stamp pad and a sponge wedge and gently sponged the edges of my clouds. Doing this is a simple way to make things look like they are popping off your page!

Here comes the sun
Next I wanted to added a nice big, warm sunshine to my page. I grabbed a circle punch and punched out my sunshine. I tried a couple of different sizes before I settled on 1 3/4″.
Scrappy little tip: You can trace the opening of a drinking glass and hand cut a circle if you do not have a circle punch.

I also sponged the edges of my sunshine with a dark yellow ink pad and sponge wedge. It really makes it stand out!
Matte for more
Next it was time to start playing with the photos. You can absolutely add your photos to your page as is, or you can matte or double matte them for a more finished look. I usually double matte mine with white card stock and then a color that I am using on my page. This also helps to give your page a nice cohesive feel. To do this I cut each layer 1/4″ bigger on all 4 sides.

Titles tell the tales
I usually add a title of some sort to my pages. Adding a title can often help the page viewer to get a better understanding of the photos. Titles are optional and not everyone likes to use them. It’s your page, it’s most definitely up to you!
I used my Cricut to make my title for this page. I played around with different fonts before settling on Ariel. I adjusted the size to fit the space I had available and let the machine do it’s magic!

I added the title to my page along the bottom.
Scrappy little tip: You can use the piece that the letters are cut from as a guide when gluing your letters in place. It keeps them spaced evenly and keeps your letters straight.

That’s a wrap
Last thing I always add to my page is the date. I add it onto a strip of paper and ruffle up the edges with my fingernail. Then I tuck it under the edge of a photo and call the page done!
Here is one last look at the finished page.

Thank you so much for stopping by and hanging out today! I have so many pages and techniques and ideas that I want to share with you! Be sure to come back soon!
Have a scrappy day!


