
I’m ready to scrapbook my heart out! What now…?
Mar 03, 2021
So, you are ready to start scrapbooking, but you have no idea where to begin! Does this sound familiar to you? I promise that it is not as scary as it sounds and I will do my best to get you on the right track! Before we get started though, I want you to think about this like building a house from the ground up. It requires space to put the house, supplies and tools to do your house building, time to get that building done and decorations to fill your house!

Let’s find some land
First thing you will want to do is find a place to put your house, right? Task #1 is to find a place that you can scrapbook. It doesn’t have to be big or fancy. You will need some room to spread out a little so you can work. Wander around your house and find a place that you can claim as your scrapbooking space! You can use your dining room table. You can use a desk or set up a folding table. Is there any counter space in your house not being used at the moment? No need to be too picky, any flat surface will do! You can even spread out on the floor! Go ahead and find a space to call your own…I’ll wait here!

Let’s talk supplies
You are going to need some basic supplies to get started and a few tools to get your house foundation built. This is usually where it starts to feel really overwhelming for people. Although it can be, we are going to get started slowly and try to avoid that overwhelm. Just like when building a house, you will need to gather together the structural supply items to build the foundation. When referring to scrapbooking, our foundation is our album. Let’s talk more about that.

Albums are not all created equal
When deciding on an album, or your house foundation, you have a few decisions to make. The first decision is size. How large would you like your foundation, or album, to be? This matters for a couple of reasons. A larger album will allow you to add more pictures and doo dads to your pages, but may also leave you feeling like you need to fill in the whole page. That can be a lot of pressure! A smaller album offers less room to add pictures, but may also allow you to make pages that are more simple and focus more on the photos.

Some things to think about
Before deciding on an album, spend a little bit of time thinking about whether you might prefer to add a lot of pictures or fewer pictures. Also, think a little about how much you would like to decorate your house, or album pages in our case. Keep in mind that there is no wrong way to do this! I encourage you to try different things until you settle into your style.
Does size really matter?
There are lots of album sizes to choose from. You can find them in 4″ x 6″, 6″ x 6″, 6″ x 8″, 8″ x 8″, 8.5″ x 11″ and 12″ x 12″. There are probably others too, but these tend to be the most popular sizes and easiest to find page supplies for. Here are a few of those size examples:
This is an 8″ x 8″:

Here are a 6″ x 8″ and a 12″ x 12″ together.

Personally, my favorite size to scrap in is 12″ x 12″ like the one below:

The advantages of this size album are:
- They are readily available for purchase.
- They are capable of holding lots of pages.
- You can add many photos on each page because of the large size.
- There is lots of room for creating and decorating.
- They offer lots of space for your journaling or picture notes.
The disadvantages to this size album are:
- They can get heavy!
- All of the white space on the page can feel intimidating to fill.
- They can be challenging to store because of their size.
Despite all of that, this is still my favorite size to scrap in! I tend to fill the whole page with lots of goodies and this size allows me the freedom to add several pictures or fewer pictures and lots of decorative items.

Next thing you need to think about is the functionality of your album. When building your house, you want to consider how well things will flow for you. You want a floorplan that lends itself to your needs and makes living in it a breeze. This is the same principle when thinking about the functionality of your album. There are 4 different popular hinge methods to most albums. Let’s talk about those.
Spiral hinge

The first hinge type is a spiral hinge, like the one pictured above. The pages are fixed and you add your photos right to them. These tend to be a less user friendly option, because you cannot go back and add pages to them. If you accidentally skip an event and didn’t leave a blank page for it, you are out of luck. This is a concern if you scrap in time order (chronologically).
This is what a spiral page album looks like laying open.

These tend to be less expensive, because they offer less flexibility than other kinds of albums.
The post hinge

The second album hinge type is called a post hinge. This is an album that holds it’s pages in place using posts or rods. These are more forgiving than spiral hinges, because you can go back and add or remove pages, but it is not an easy task! To do so, you have to remove the screw and take all of the pages out and then add them again in the order you want. This is what a post or rod hinge looks like.
Threaded strap hinge

The third type is similar to the post bound, but the hinge mechanism is a thick plastic strip that threads through your pages to hold them in place. This is what a strap hinge looks like:
D-ring hinge

The fourth type of hinge system is the D-ring. This one is my absolute favorite. They are the easiest to add and remove pages to. You simply flip to the section you want and pop open the rings. You can add or pull out a page in no time flat. There is no wrestling with the pages. These albums resemble an old school binder, but the rings are D shaped. Hence, where the name comes from. I am in the process of switching all of my albums over to the D-ring design. I will forever more be a D-ring girl!
Well, that’s pretty!

When building your house, you need to decide how it will look on the outside. It is the same for your album. The next thing to think about is how you want your albums to look on the outside and there are a ton of choices! In addition to different sizes, you can find albums with all sorts of colorful or decorative fronts. They also come in stripes and solids. You can find them with pictures or quotes. Some album covers are made of cloth and others have leather or faux leather covers. If you are looking to customize, you can even find albums that have a place to tuck a cover photo. You can choose based on the theme of the album or just go with a neutral color. I would recommend that you shop around to find a style that makes your heart happy!
Here is an example of some of the different colors you can find:
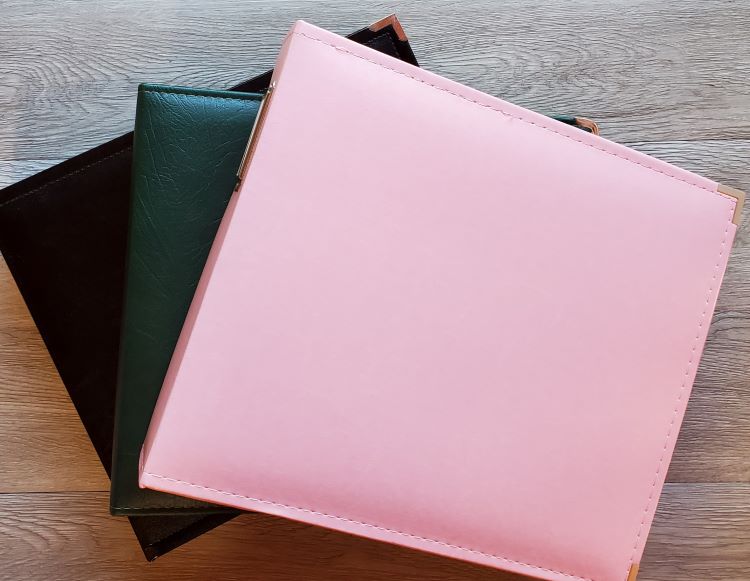
Currently, I am working on 9 different albums! I am going with solid black for my children’s albums. I am using different colors for my grand kiddo’s albums and black with subtle polka dots for our family albums. This system helps me to grab the right album at a glance.
A nice little bonus!
Another nice little bonus feature that you can look for when shopping for albums is a corner protector. It is a simple metal looking overlay that helps to keep your album edges protected. This is especially useful if you expect your albums to be handled often.
Here is an example of that:

That’s a wrap!
Ok then, that about wraps up the mystery of albums and their many, many choices. If you have any questions or just want to chat more about albums feel free to leave me a comment or send me an email! On that note, I will be back soon with the next part of this fun series!
Have a scrappy day!


